Here is my experience setting up our UniFi Security Gateway to work in bridge mode with the PACE 5268AC for use with AT&T's GigaPower fiber service.
What, No Bridge Mode?
The first thing to know is that there is no such thing as bridge mode with these routers. The problem with a true bridge is that even if you put a gateway behind the PACE, you still need the ability to plug DVRs (or the wireless bridges used by wireless DVRs) into the modem and communicate with AT&T's network to retrieve video, guide data, etc. They can't just pass all traffic through to another device.
In a traditional setup where you just use AT&T's router as the gateway for everything, it creates a simple NAT network (on 192.168.1.x) that your wired devices and DVRs share. But if you want to manage your own network behind the router -- or in my case, disable the crappy PACE WiFi and use my own access points -- their solution is to provide a pseudo-bridge mode called "DMZplus" which gives you something reasonably close, while still allowing the other ports on your router to continue to NAT out to the internet like normal. It works by leaving all of the existing stuff in place (the 192.168.1.x network, the NAT, etc.), but instead of firewalling unknown incoming connections, it passes any traffic that is not already associated with an existing session straight to the DMZplus host. This includes letting DHCP through, giving the public IP directly to the DMZplus host rather than forcing you to double-NAT.
Setting It Up
1. Change the PACE Network Range
To avoid conflicts or weird things leaking through, I went ahead and changed the network on the PACE router, since both it and the USG use the 192.168.1.x network by default. Your mileage may vary, but if nothing else it makes it easier to diagnose issues when the networks aren't similarly numbered.
Navigate to Settings -> LAN -> DHCP on the PACE router and change the radio button from "192.168.1.0 / 255.255.255.0" to "172.16.0.0 / 255.255.0.0".
If the PACE router doesn't restart itself after changing this setting, you may want to restart the PACE router just to make sure it will hand out the new range when you hook things up.
2. Connect Your Gateway
Next, connect the WAN port on your gateway to an open port the PACE router. This will cause it to get an IP address over DHCP and show up on the PACE side.
Once you do so, it should be visible in Settings -> LAN -> Status in the "Devices" section:
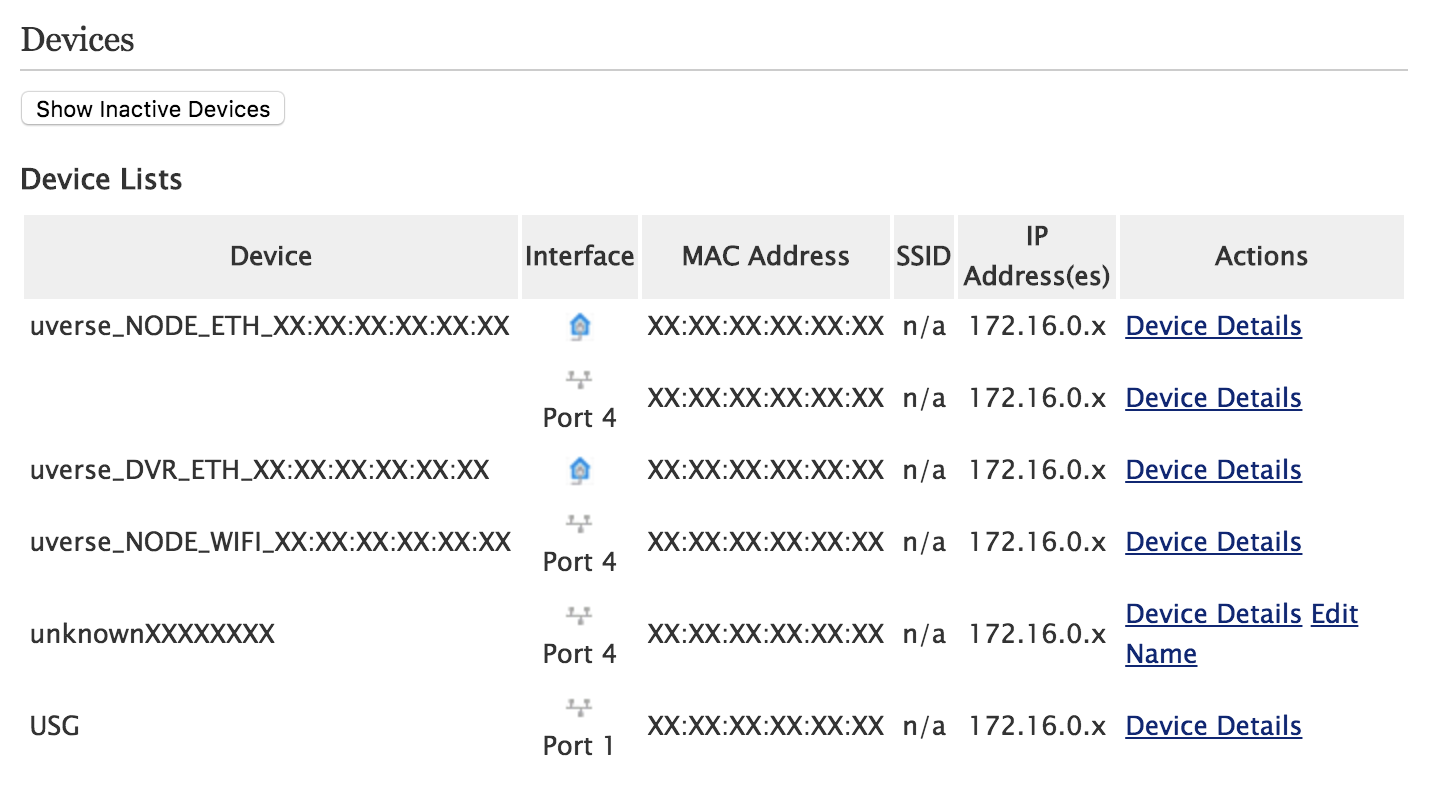
(The name will probably match whatever your router advertises itself as in its DHCP request.)
3. Make Your Gateway The DMZplus Host
Now, navigate to Settings -> Firewall -> Applications, Pinholes and DMZ. Look for your gateway in the "Select a computer" section and click on it. Once you do, it should say "You have chosen <gateway name>"

Now that your gateway is selected, scroll down to the "Edit firewall settings for this computer" section and click the "Allow all applications (DMZplus mode)" radio button. Then click the "Save" button at the bottom.

4. A Warning About Advanced Configuration
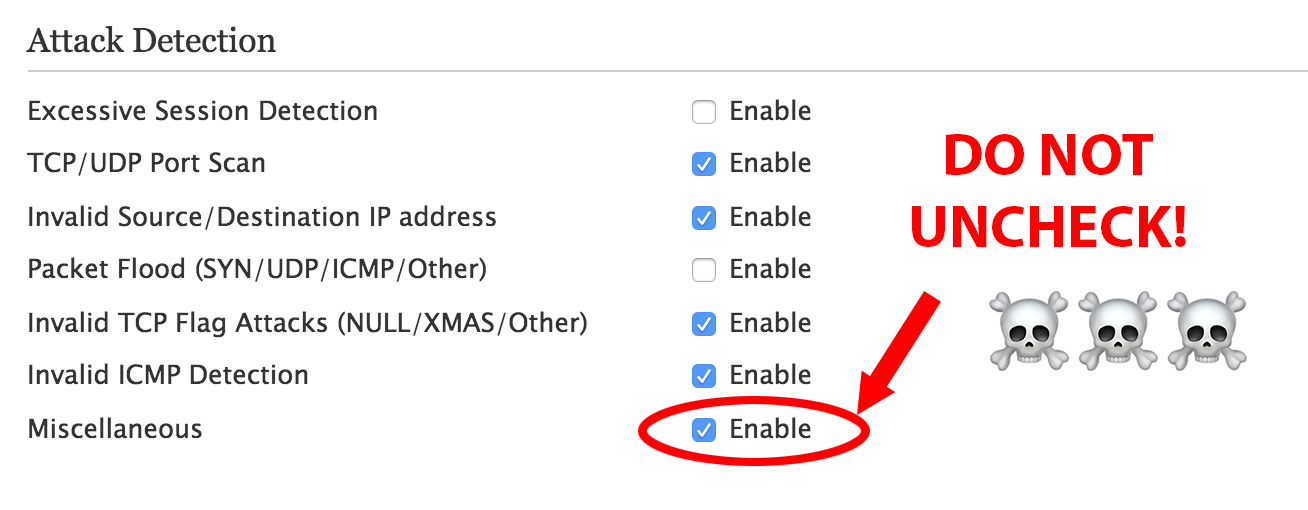
Originally I had unchecked everything under Settings -> Firewall -> Advanced Configuration assuming I would leave it up to the PACE router to handle security.
Because of this, I spent a number of days attempting to diagnose a weird bug where certain hosts would have massive amounts of packet loss and the internet was nearly unusable. It turns out that if you uncheck "Miscellaneous" under "Attack Detection", then any device that attempts to map a port using UPnP would cause the PACE router to create a faulty mapping that would pass un-NATted traffic directly through. This will cause havoc with some IoT devices, consoles, etc. that still use UPnP for port mapping.
In hindsight, it's probably good to leave most of this stuff on anyways as an extra layer of protection, if you have any other devices like DVRs or wireless DVR bridges plugged directly into the router.
5. Configure Your Gateway
I've been going through my settings on my USG to see if there's anything in particular I have to configure to make it work well with the PACE router, but I'm not finding anything beyond my own personal preferences as far as firewall, network, etc.
At one point I know I had configured it to always allow DHCP ports 67 and 68 through because I was seeing an issue with holding onto the DHCP lease, but it appears that's not actually enabled and I'm not seeing any ill effects. ¯\_(ツ)_/¯
That's It!
There really isn't too much to it, just a few pitfalls. Seriously, though, don't un-click "Miscellaneous." Don't do it!
Share on Facebook